As an Amazon Associate, I earn from qualifying purchases
Mishaps, or everyday wear and tear, these small imperfections require prompt attention to prevent larger problems down the road.
Most minor paint chips can be repaired at home with the right tools, techniques, and patience. This comprehensive guide will walk you through everything you need to know about fixing car paint chips, from identifying the damage to applying professional-quality repairs that blend seamlessly with your vehicle’s original finish.
You’ll learn how to assess chip severity, gather the necessary materials, and execute repairs that not only restore your car’s appearance but also protect it from future damage. With proper technique and attention to detail, you can achieve results that rival professional bodywork while saving hundreds of dollars in repair costs. Understanding how to protect car paint through proper repair techniques ensures your investment maintains its value and appearance for years to come.
Table of Contents
- 1 Why It’s Important to Fix Paint Chips on Your Car
- 2 How to Fix Chips in Car Paint (Step-by-Step)
- 3 Best Products for Fixing Car Paint Chips
- 4 How to Prepare Your Car for Painting
- 5 How to Match Paint Color and Apply the Repair
- 6 Frequently Asked Questions About Fix Chips in Car Paint.
- 7 Restore Your Car’s Beauty and Value
Why It’s Important to Fix Paint Chips on Your Car
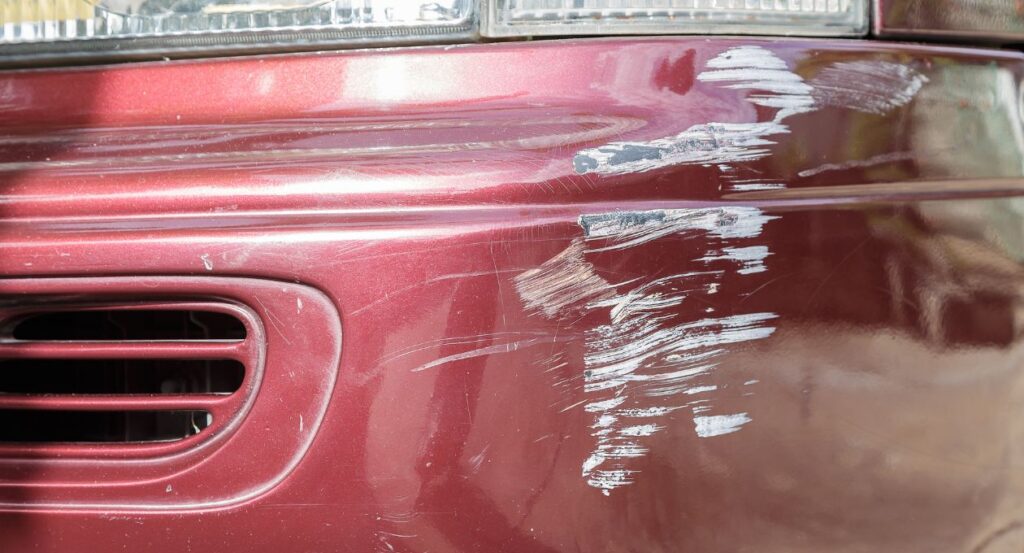
Paint chips might seem like minor cosmetic issues, but ignoring them can lead to serious consequences for your vehicle’s structural integrity and resale value. Understanding why prompt repair matters will motivate you to address these problems before they escalate.
Prevents Rust and Corrosion
The primary function of automotive paint extends far beyond aesthetics. Paint serves as your car’s first line of defense against moisture, salt, and environmental contaminants that cause rust. When chips expose bare metal to the elements, oxidation begins immediately. This process accelerates in harsh climates, particularly areas where road salt is used during winter months.
Rust doesn’t stop at the surface level. Once it takes hold, corrosion spreads beneath the surrounding paint, creating bubbles and flaking that requires extensive bodywork to repair. What starts as a simple touch-up job can quickly become a major panel replacement if left untreated.
Maintains Vehicle Value
Automotive experts estimate that visible paint damage can reduce a vehicle’s resale value by 10-15%. Potential buyers often view paint chips as indicators of poor maintenance, questioning what other issues might be lurking beneath the surface. Professional appraisers specifically look for paint damage when determining trade-in values.
Regular paint maintenance demonstrates pride of ownership and attention to detail. A well-maintained exterior suggests the vehicle has been cared for mechanically as well, making it more attractive to discerning buyers.
Protects Against Environmental Damage
Modern automotive paint systems consist of multiple layers designed to protect the underlying metal substrate. When chips penetrate through the clear coat, base coat, and primer, they create weak points where environmental damage accelerates. UV radiation, acid rain, and industrial pollutants can penetrate these openings, causing widespread paint degradation.
Early intervention stops this cascade effect, preserving the integrity of your vehicle’s protective coating system. Learning how to protect car paint through timely repairs prevents minor damage from becoming major restoration projects.
How to Fix Chips in Car Paint (Step-by-Step)
Repairing paint chips requires patience and attention to detail, but the process itself is straightforward when broken down into manageable steps. Success depends on proper preparation, quality materials, and following each stage carefully.
Step 1: Clean the Damaged Area
Begin by thoroughly washing the entire vehicle to remove surface contaminants that could interfere with paint adhesion. Pay special attention to the chipped areas, using soap and water to remove dirt, road salt, and debris. Allow the surface to dry completely before proceeding.
For stubborn contaminants, use a clay bar or automotive decontamination product to ensure perfect cleanliness. Any residue left on the surface will prevent proper paint bonding and compromise your repair.
Step 2: Assess the Damage Depth
Understanding the extent of damage determines your repair approach. Use your fingernail to test chip depth. If your nail catches on the edge, the damage has penetrated through multiple paint layers and requires more extensive repair.
Surface-level chips that only affect the clear coat need minimal intervention, while deep chips exposing primer or bare metal require full system reconstruction. Take time to examine each chip individually, as damage severity often varies across the affected area.
Step 3: Sand and Prepare the Surface
For deep chips, light sanding with 400-grit sandpaper removes loose paint and creates a smooth transition between damaged and healthy areas. Sand gently using circular motions, focusing on feathering the edges rather than enlarging the damaged area.
Remove all sanding dust with a tack cloth or lint-free rag. Any particles left on the surface will create texture problems in your final repair.
Step 4: Apply Primer (If Needed)
When chips expose bare metal or plastic, primer application is essential for proper paint adhesion and rust prevention. Use automotive primer specifically designed for your vehicle’s substrate material. Apply thin, even coats, allowing each layer to dry completely before adding the next.
Most repairs require 2-3 primer coats for adequate coverage and protection. Sand lightly between coats with 600-grit paper to maintain smoothness.
Step 5: Apply Base Color
Match your vehicle’s paint code exactly—this information is typically found on a sticker in the door jamb or glove compartment. Apply base color in thin layers, building coverage gradually rather than attempting to cover the repair in a single thick coat.
Allow each coat to flash off (become tacky to the touch) before applying the next layer. This typically takes 10-15 minutes, depending on temperature and humidity conditions.
Step 6: Apply Clear Coat
Clear coat provides gloss and durability to your repair. Apply 2-3 thin coats, allowing proper flash time between applications. The final coat should slightly overfill the repaired area to account for shrinkage during curing.
Step 7: Wet Sand and Polish
After 24-48 hours of curing time, wet sand the repair area with progressively finer grits (1000, 1500, 2000) to level the surface with the surrounding paint. Follow with polishing compound and wax to restore gloss and blend the repair invisibly.
Best Products for Fixing Car Paint Chips
Selecting quality products makes the difference between professional-looking repairs and obvious patches. Understanding your options helps you choose the right materials for your specific situation and skill level.
Touch-Up Paint Kits
Complete touch-up kits provide everything needed for basic chip repair in one convenient package. High-quality kits from manufacturers like SEM, Dupli-Color, and Automotive Touch-up include color-matched paint, primer, clear coat, and application tools.
Look for kits that offer multiple application methods—brush applicators work well for larger chips, while fine-tip applicators excel at precision work on small imperfections. Some premium kits include wet sanding supplies and polishing compounds for professional-quality finishing.
Paint Pens
Paint pens offer excellent control for small chip repairs and are ideal for beginners. The built-in applicator tip allows precise paint placement without the mess associated with brush application. Leading brands like Mopar, GM, and Ford offer OEM-matched paint pens for most vehicle models.
Choose paint pens with replaceable tips when possible, as worn applicators can create streaky finishes. Store pens tip-down to maintain proper paint flow and prevent clogging.
Professional Spray Systems
For extensive damage or multiple repairs, aerosol spray systems provide the most professional results. Products like SEM Plastic Prep Spray and Rust Mort neutralize corrosion and prepare surfaces for optimal paint adhesion.
Two-component spray systems that mix paint and activator produce exceptionally durable finishes that closely match factory paint quality. These systems require more skill but deliver superior long-term results.
Specialty Tools and Accessories
Quality tools improve repair outcomes significantly. Fine artist brushes (sizes 0-2) offer superior control compared to standard touch-up brushes. Toothpicks and dental picks help position paint precisely in narrow chips.
Invest in proper masking tape and plastic sheeting to protect surrounding areas during repair. Automotive-grade masking products leave clean lines without residue that could contaminate your paint work.
How to Prepare Your Car for Painting
Proper preparation accounts for 80% of paint repair success. Rushing through prep work virtually guarantees poor results, while thorough preparation ensures professional-quality outcomes even for novice painters.
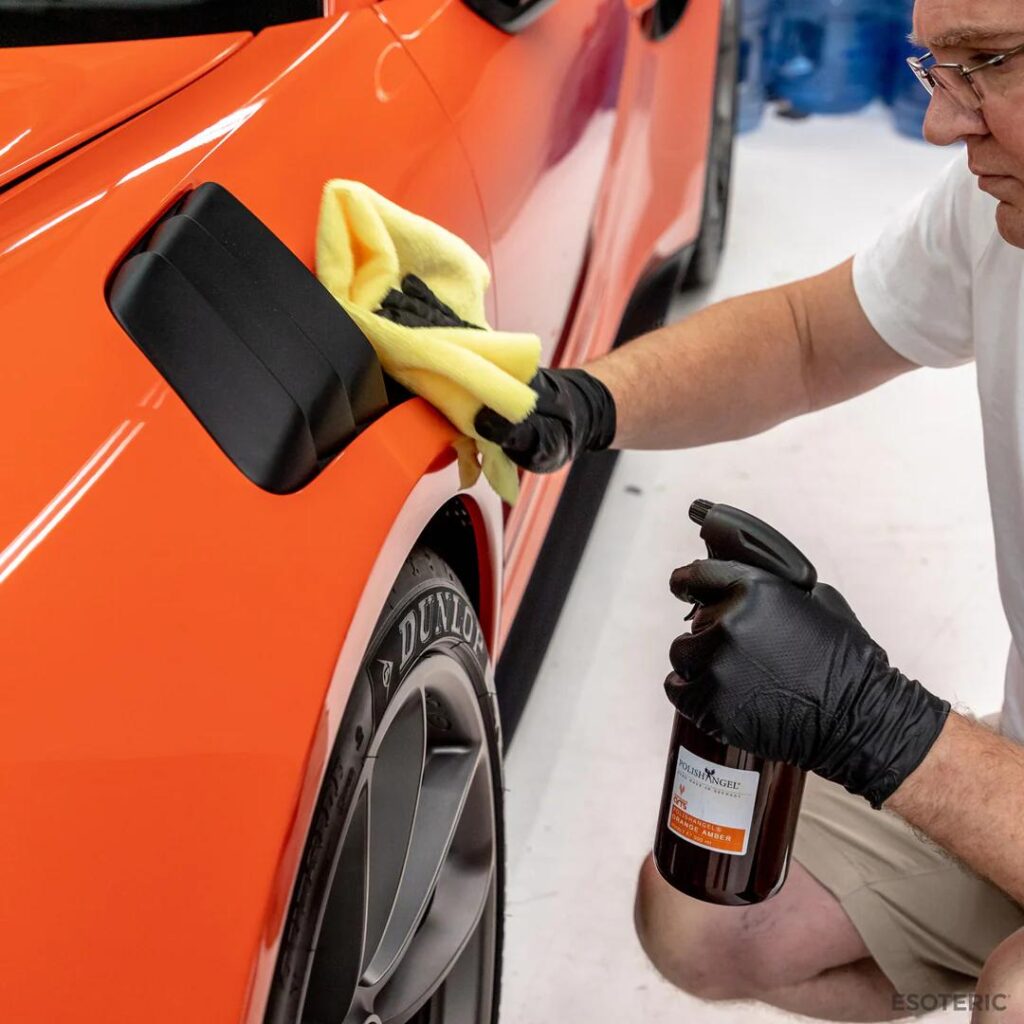
Cleaning and Decontamination
Start with a complete vehicle wash using automotive-specific soap that won’t leave residues. Pay particular attention to areas around the damage, removing all traces of wax, polish, and road contaminants that could interfere with paint adhesion.
Clay bar treatment removes embedded contaminants that washing alone cannot eliminate. Work systematically across the entire panel, not just the damaged area, to ensure uniform surface preparation. Industrial fallout, tree sap, and tar deposits must be completely removed before painting begins.
Sanding Techniques
Proper sanding creates the mechanical adhesion necessary for lasting paint repairs. Use the finest grit that effectively removes damage—aggressive sanding creates more work and increases the risk of visible repair lines.
For surface-level damage, 600-grit paper provides adequate tooth for paint adhesion. Deeper chips may require starting with 400-grit to remove loose edges, followed by progressively finer grits to smooth the repair area.
Always sand with consistent pressure and overlapping strokes. Random orbital sanders work well for larger areas, while hand sanding gives better control around delicate trim pieces and body lines.
Masking and Protection
Professional masking prevents overspray and creates crisp repair boundaries. Use high-quality automotive masking tape that removes cleanly without leaving adhesive residue. Apply tape with firm pressure to prevent paint bleeding underneath.
Extend masking well beyond the immediate repair area—overspray travels farther than most people realize. Remove masking tape while the paint is still slightly wet to prevent peeling and create smooth edges.
How to Match Paint Color and Apply the Repair
Color matching separates amateur repairs from professional-quality work. Even small variations in shade, metallic content, or pearl orientation become obvious under different lighting conditions.
Finding Your Paint Code
Vehicle paint codes are typically located on door jamb stickers, firewall plates, or inside the glove compartment. These alphanumeric codes ensure exact color matching when ordering touch-up materials. If the original sticker is missing or illegible, dealership parts departments can often provide paint codes using your VIN number.
Some vehicles have multiple paint codes for the same color, representing formula variations or different suppliers. When in doubt, take your vehicle to a paint supplier for computer color matching using spectrophotometer technology.
Color Matching Techniques
Test paint color on an inconspicuous area before applying it to visible damage. Even correctly coded paint can appear different due to factory color variations or paint fade from UV exposure. Automotive paint suppliers can adjust formulas to account for these variations.
Metallic and pearl paints require special attention to particle orientation and spray technique. These finishes must be applied with proper gun distance and overlap patterns to achieve a uniform appearance. Practice on scrap metal before attempting repairs on your vehicle.
Application Methods
Brush application works well for small chips but requires steady hands and patience. Load the brush lightly and apply paint in thin layers, allowing each coat to level before adding the next. Avoid overworking the paint, which can create brush marks and texture problems.
Spray application produces the smoothest finish but requires more skill and equipment. Maintain consistent gun distance (6-8 inches) and overlap each pass by 50% for even coverage. Apply multiple thin coats rather than attempting full coverage in one heavy application.
Frequently Asked Questions About Fix Chips in Car Paint.
Can I fix car paint chips myself?
Yes, most small to medium-sized paint chips can be successfully repaired at home with proper materials and techniques. DIY repairs work best on chips smaller than a pencil eraser that haven’t penetrated to bare metal. Larger damage or chips exposing significant metal areas may require professional attention to achieve invisible repairs.
Success depends on taking time for proper preparation, using quality materials, and following each step carefully. While DIY repairs may not achieve perfect factory-finish quality, they can be virtually invisible when done correctly and will provide excellent protection against rust and further damage.
How long does it take for touch-up paint to dry?
Touch-up paint drying time varies depending on temperature, humidity, and paint type. Most automotive paints become tack-free within 30-60 minutes but require 24-48 hours for complete curing. Avoid washing or waxing repaired areas for at least one week to allow full chemical cure.
Cold temperatures and high humidity significantly extend drying times. For best results, apply paint when temperatures are between 70-80°F with relative humidity below 50%. Forced air circulation can help accelerate drying, but avoid direct heat sources that may cause paint defects.
Will fixing paint chips prevent rust?
Yes, properly executed paint chip repairs effectively prevent rust formation by sealing exposed metal from moisture and oxygen. The key is addressing chips promptly before corrosion begins—once rust starts, it must be completely removed before painting, or it will continue spreading beneath the new paint.
Quality repairs that include proper primer application provide long-term rust protection equivalent to factory finishes. However, poor repairs that trap moisture or fail to seal completely can actually accelerate corrosion problems.
Can I use any type of paint for chips?
No, automotive paint chemistry is specifically formulated for vehicle applications and environmental exposure. Household paints lack the durability, flexibility, and UV resistance needed for automotive use. Always use automotive-grade paint products designed for your specific vehicle type and paint system.
Different vehicle manufacturers use varying paint technologies—single-stage, base coat/clear coat, waterborne, and specialty finishes each require compatible repair products. Using incorrect paint types can result in adhesion problems, color mismatch, and premature failure.
How do I know if I need professional help for larger paint chips?
Consider professional repair when chips are larger than a quarter, expose significant bare metal, or occur on highly visible areas likethe hood or door centers. Multiple chips in the same area often benefit from professional panel repainting to achieve a uniform appearance.
Complex paint systems with multiple colors, special effects, or custom finishes typically require professional expertise and equipment. If you’re uncomfortable with any aspect of the repair process or the damage seems beyond your skill level, professional consultation can save time and prevent costly mistakes.
Restore Your Car’s Beauty and Value
Fixing paint chips doesn’t require professional expertise—just patience, quality materials, and attention to detail. By following these proven techniques, you can restore your vehicle’s appearance while protecting it from costly rust damage and preserving its resale value.
But that’s not all—protecting your car’s paint is just as important. Regular maintenance and protection go a long way in preventing future chips, scratches, and wear. For more details on how to keep your car’s paint looking fresh and safe from the elements, be sure to check out our guide on How to Protect Car Paint.
Remember that successful paint repair is about more than just covering damage. Proper preparation, color matching, and finishing techniques ensure your repairs blend invisibly with the surrounding paint and provide lasting protection. Take your time with each step, and don’t hesitate to practice techniques on test pieces before working on your vehicle.
Start addressing those paint chips today. Your car’s appearance, protection, and value depend on the care you provide. With these skills in your automotive maintenance toolkit, you’ll be equipped to keep your vehicle looking its best for years to come.
As an Amazon Associate, I earn from qualifying purchases