As an Amazon Associate, I earn from qualifying purchases
Your car’s dashboard takes a beating every day. From keys tossed carelessly onto the surface to UV rays streaming through the windshield, countless factors contribute to unsightly scratches that mar your vehicle’s interior. These blemishes don’t just affect your car’s appearance—they can significantly impact its resale value and create entry points for dirt and debris that cause further damage.
The good news? Most dashboard scratches can be repaired at home using simple techniques and readily available products. Whether you’re dealing with light surface scratches or deeper gouges, the right approach can restore your dashboard to its original smooth finish.
This comprehensive guide walks you through proven methods for removing scratches from your car dashboard, helping you maintain your vehicle’s interior and preserve its value. You’ll learn which products work best, how to apply them correctly, and when it might be time to seek professional help.
Table of Contents
Why Removing Dashboard Scratches Matters More Than You Think
Dashboard scratches might seem like minor cosmetic issues, but they can have lasting consequences for your vehicle. The most obvious impact is aesthetic—scratches create an aged, worn appearance that detracts from your car’s overall appeal. When potential buyers see a scratched dashboard, they often assume the vehicle hasn’t been well-maintained, which can result in reduced offers by hundreds or even thousands of dollars.
Beyond appearance, untreated scratches pose practical problems. These surface breaks become magnets for dust, dirt, and spilt liquids. Over time, debris works its way deeper into the material, making repairs more difficult and potentially causing permanent discolouration. What starts as a simple surface scratch can evolve into a stained, cracked area requiring complete dashboard replacement.
Dashboard materials—whether vinyl, plastic, or leather—are also susceptible to UV damage. Scratches compromise the protective surface layer, making the exposed material more vulnerable to sun bleaching and cracking. By addressing scratches promptly, you maintain the integrity of the entire dashboard surface.
Step-by-Step Guide: How to Remove Scratches from Car Dashboard
Step 1: Clean the Dashboard Thoroughly
Before attempting any repair, you must start with an immaculate surface. Use a vacuum with a brush attachment to remove loose dirt and debris from the scratched area. Follow up with a microfiber cloth slightly dampened with warm water to wipe away any remaining dust.
For stubborn grime, use a mild automotive interior cleaner. Spray the cleaner onto your cloth rather than directly on the dashboard to avoid oversaturating the material. Pay special attention to the scratched areas, ensuring no particles remain that could interfere with the repair process.
Allow the dashboard to dry completely before proceeding. Any moisture trapped beneath repair products can cause bubbling or poor adhesion, leading to subpar results.
Step 2: Assess the Scratch Depth
Run your fingernail gently across the scratch. If your nail catches, you’re dealing with a deep scratch that may require professional attention or specialised products. Surface-level scratches that miss your nail are prime candidates for DIY repair.
Light scratches often appear white or lighter than the surrounding material. These typically affect only the top layer of the dashboard surface and respond well to restoration products. Deeper scratches may appear darker and feel rough to the touch.
Step 3: Apply a Scratch Repair Kit
Automotive scratch repair kits explicitly designed for dashboard materials offer the most reliable results. These kits typically include a cleaning solution, repair compound, and application tools.
Start by applying a small amount of repair compound to the provided applicator or a clean microfiber cloth. Work the compound into the scratch using gentle, circular motions. The goal is to fill the scratch while blending the repair compound with the surrounding material.
For vinyl and plastic dashboards, look for products containing plasticisers that help restore flexibility to the repaired area. These compounds not only fill scratches but also condition the material to prevent future cracking.
Step 4: Use a Vinyl or Plastic Restorer
Once the repair compound has been applied and allowed to set according to the manufacturer’s instructions, follow up with a quality vinyl or plastic restorer. These products serve multiple purposes: they help blend the repaired area with the surrounding surface, add protective properties, and restore the material’s natural sheen.
Apply the restorer using a clean microfiber cloth, working in thin, even coats. Avoid applying too much product, as this can create a glossy appearance that looks unnatural. The goal is to match the existing finish of your dashboard.
Allow the restorer to penetrate the material for the recommended time before proceeding to the final step.
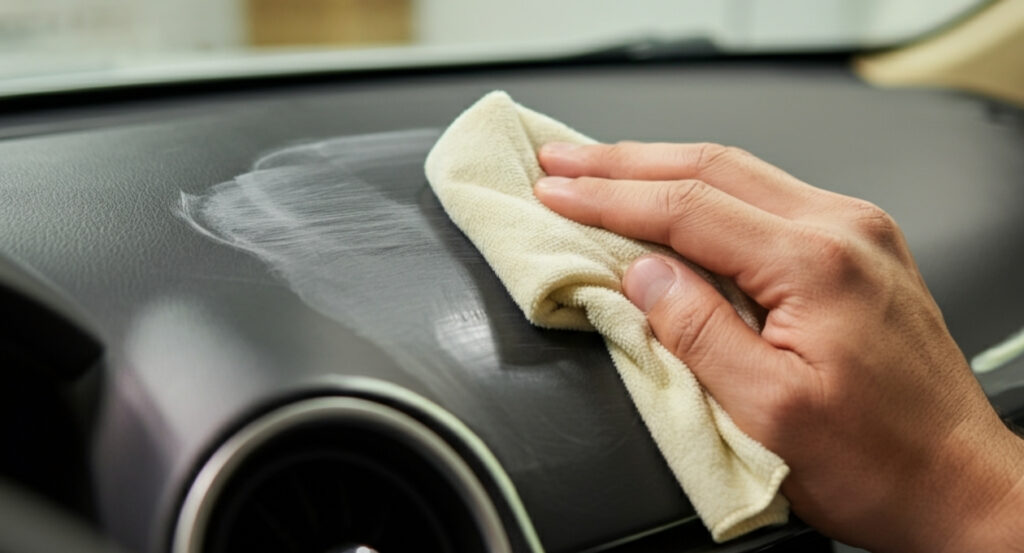
Step 5: Buff for a Smooth Finish
Using a clean, dry microfiber cloth, gently buff the treated area in circular motions. This step removes any excess product and helps achieve a uniform appearance that matches the rest of your dashboard.
Take your time during this process, checking your progress frequently. The repaired area should gradually blend with the surrounding material until the scratch becomes virtually invisible.
Step 6: When to Consider Professional Repair
Some dashboard damage exceeds what DIY methods can address effectively. Deep gouges that penetrate multiple layers of material, extensive cracking, or damage covering large areas typically require professional intervention.
Professional repair services have access to specialised tools and materials not available to consumers. They can also colour-match repairs more precisely and may offer warranties on their work. If your initial repair attempts don’t produce satisfactory results, or if you’re uncomfortable working on valuable vehicles, professional repair is often worth the investment.
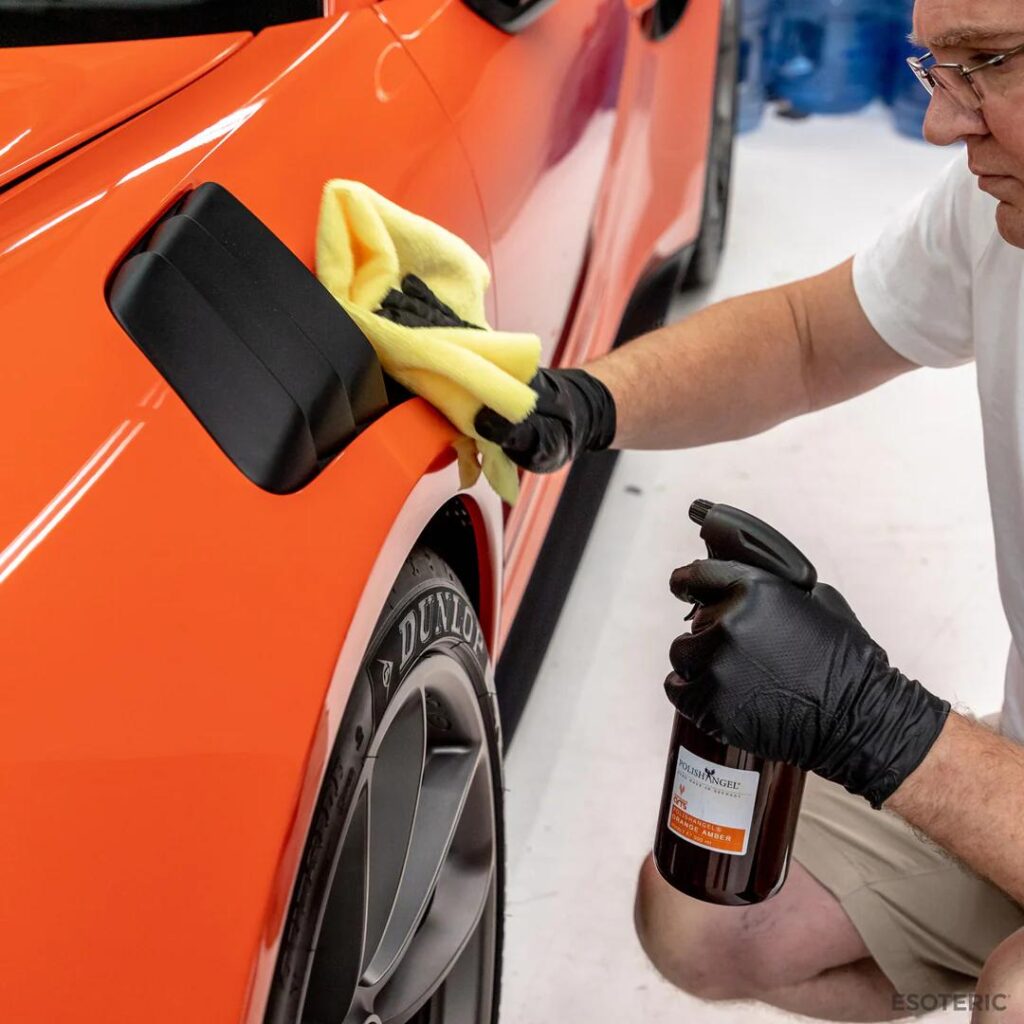
Best Products for Dashboard Scratch Removal
The automotive market offers numerous products for dashboard repair, but quality varies significantly. Here are some top-performing options that consistently deliver professional-quality results:
Chemical Guys VRP (Vinyl, Rubber, Plastic) excels at restoring faded and scratched vinyl dashboards. Its water-based formula won’t leave greasy residues, and it provides UV protection to prevent future damage.
Meguiar’s Endurance Tire Gel doubles as an effective dashboard restorer for plastic surfaces. Despite its name, this product works exceptionally well on scratched dashboard materials, providing long-lasting protection and a natural-looking finish.
303 Aerospace Protectant offers premium protection and restoration for all dashboard materials. Originally developed for aircraft interiors, this product provides superior UV protection while restoring scratched surfaces to like-new condition.
For deeper scratches, Novus Plastic Polish System provides a three-step process that can handle more severe damage. The graduated system allows you to match the repair intensity to the scratch severity.
Leather-specific products like Lexol Leather Conditioner should be used on leather dashboards, as vinyl and plastic products can cause discolouration or damage to genuine leather surfaces.
Preventing Future Dashboard Scratches
Prevention remains the most effective strategy for maintaining your dashboard’s appearance. Simple habits can dramatically reduce the likelihood of scratches and extend your dashboard’s lifespan.
Install a dashboard cover or sunshade when parking for extended periods. These accessories protect against UV damage and prevent objects from sliding around on the dashboard surface during driving.
Establish a no-objects policy for your dashboard. Keys, phones, sunglasses, and other items should have designated storage areas rather than being placed on the dashboard surface. Even seemingly harmless objects can cause scratches during sudden stops or turns.
Regular cleaning prevents dirt buildup that can act like sandpaper against your dashboard. Use appropriate cleaning products monthly, and address spills immediately to prevent staining and material degradation.
Consider applying a protective coating annually. Products like ceramic coatings or high-quality protectants create a barrier against scratches while making cleaning easier and more effective.
Frequently Asked Questions
Can I use toothpaste to remove scratches from my car dashboard?
While toothpaste can work on some plastic surfaces, it’s not recommended for car dashboards. Most toothpastes contain abrasives that can worsen scratches on automotive materials. Additionally, toothpaste lacks the conditioning agents needed to properly restore dashboard materials. Stick to products specifically designed for automotive interiors.
How can I fix deep scratches on my dashboard?
Deep scratches that catch your fingernail require more intensive repair methods. Start with a plastic repair compound designed for deeper damage, followed by progressive polishing with increasingly fine abrasives. If the scratch extends through the colour layer, you may need touch-up paint or professional repair to achieve satisfactory results.
Are scratch repair kits safe for leather dashboards?
Most general scratch repair kits are formulated for vinyl and plastic surfaces and can damage leather. Leather dashboards require specialised leather repair products that won’t alter the material’s natural properties. Always check product compatibility before applying any repair compound to leather surfaces.
Can I prevent scratches from happening in the future?
Yes, prevention is highly effective. Use dashboard covers, avoid placing objects on the dashboard, clean regularly with appropriate products, and park in shaded areas when possible. These simple steps can prevent most types of dashboard damage.
Should I seek professional repair for dashboard scratches?
Consider professional repair for extensive damage, deep scratches covering large areas, or when DIY attempts haven’t produced satisfactory results. Professional services are also recommended for luxury vehicles, where perfect colour matching is crucial.
Restore Your Dashboard’s Beauty and Value
Dashboard scratches don’t have to be permanent reminders of daily wear and tear. With the right products and techniques, most scratches can be effectively repaired at home, restoring your vehicle’s interior appearance and protecting its resale value.
The key to successful dashboard repair lies in proper preparation, using appropriate products for your specific dashboard material, and taking time to achieve professional-quality results. Remember that prevention remains your best strategy—simple habits like using dashboard covers and avoiding clutter can prevent most scratches from occurring.
Whether you’re preparing your vehicle for sale or simply want to maintain its appearance, addressing dashboard scratches promptly prevents minor issues from becoming major problems. Start with the gentlest repair method appropriate for your scratch severity, and don’t hesitate to seek professional help when needed.
Your dashboard faces daily challenges, but with proper care and timely repairs, it can maintain its appearance and functionality for years to come.
As an Amazon Associate, I earn from qualifying purchases