As an Amazon Associate, I earn from qualifying purchases
Your car’s paint is constantly under attack from the elements—UV rays, dirt, road salt, and environmental contaminants that gradually dull its appearance. Regular waxing creates a protective barrier that shields your vehicle’s finish while restoring that showroom-quality shine you love.
While hand waxing has been the traditional approach for decades, using a buffer transforms this time-consuming chore into a more efficient and effective process. A buffer distributes wax evenly across your car’s surface, eliminates the streaking common with manual application, and achieves professional-level results in half the time.
Many car owners feel intimidated by the thought of using a buffer, worried they might damage their vehicle’s paint. However, when used correctly, a buffer is actually gentler than hand waxing because it prevents the uneven pressure and circular motions that can create swirl marks. Modern buffers are designed with user-friendly features that make them accessible to beginners while still delivering the precision that professional detailers demand.
This comprehensive guide will walk you through every step of the buffering process, from selecting the right equipment to achieving that mirror-like finish that turns heads on the road.
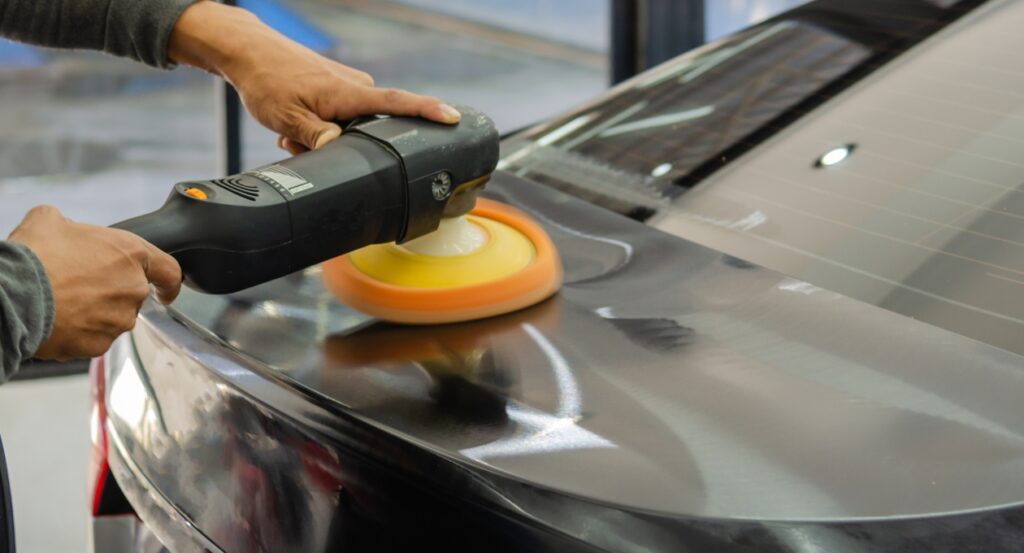
Table of Contents
Why Waxing Your Car is Important
Car wax serves as your vehicle’s first line of defense against environmental hazards that can permanently damage your paint. Without this protective layer, your car’s clear coat becomes vulnerable to oxidation, which causes the paint to fade and develop a chalky appearance over time.
The protective benefits extend beyond just aesthetics. A quality wax creates a hydrophobic barrier that causes water to bead and roll off your car’s surface, reducing water spots and preventing mineral deposits from etching into the paint. This barrier also makes it easier to remove contaminants like bird droppings, tree sap, and road tar before they have a chance to bond permanently with your car’s finish.
Regular waxing also enhances your vehicle’s resale value. A well-maintained paint job can add thousands of dollars to your car’s worth when it’s time to trade up. Potential buyers immediately notice a vehicle with a deep, glossy finish, and this visual appeal often translates into a higher selling price.
From a maintenance perspective, waxed surfaces are significantly easier to clean. Dirt and grime have difficulty adhering to the smooth, protected surface, which means your regular washes become more effective and less labor-intensive.
How to Wax a Car with a Buffer (Step-by-Step)
Step 1: Gather Your Materials
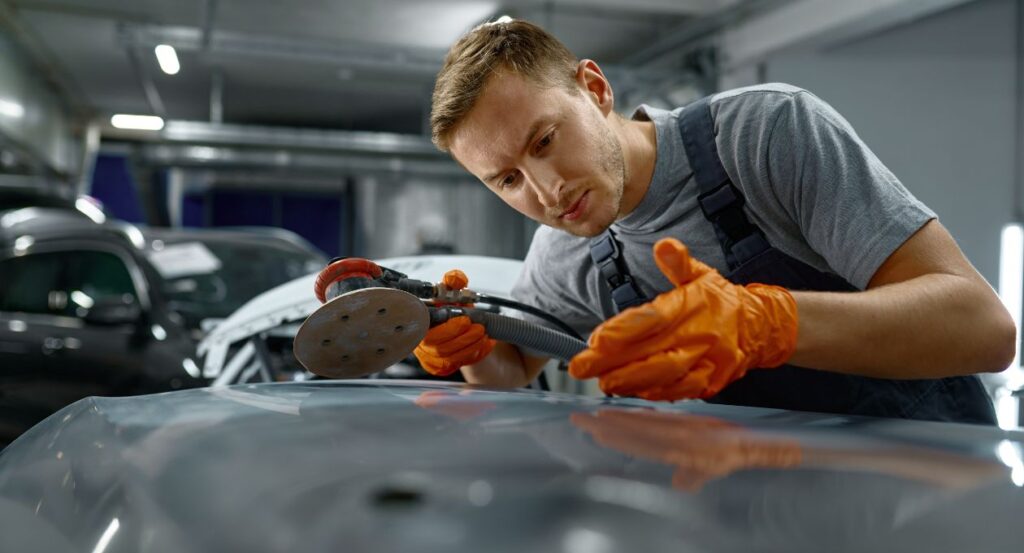
Before you begin, collect all the necessary equipment to ensure a smooth waxing process. You’ll need a dual-action buffer (also called a random orbital buffer), foam or microfiber buffing pads, high-quality car wax, microfiber towels, and a spray bottle with clean water.
Choose a buffer with variable speed settings, as this gives you better control over the application process. Dual-action buffers are ideal for beginners because they’re less likely to cause paint damage compared to rotary buffers. Make sure you have both foam applicator pads for wax application and microfiber pads for removal.
When selecting car wax, consider your local climate and driving conditions. Synthetic waxes typically last longer and provide better protection in harsh environments, while carnauba waxes offer superior depth and warmth to your paint’s appearance.
Step 2: Prepare Your Car
Start with a thoroughly clean vehicle. Wash your car using the two-bucket method—one bucket for soapy water and another for rinsing your wash mitt. This prevents dirt particles from being dragged across your paint surface, which could cause scratches during the waxing process.
After washing, dry your car completely using clean microfiber towels or a chamois. Pay special attention to crevices around door handles, mirrors, and trim pieces where water tends to collect. Any remaining water spots will become sealed under the wax, making them difficult to remove later.
Park your car in a shaded area away from direct sunlight. Hot surfaces cause wax to dry too quickly, making it difficult to remove and potentially leaving residue behind. The ideal working temperature is between 60-80°F with low humidity.
Inspect your car’s paint for any tar spots, tree sap, or stubborn contaminants that regular washing didn’t remove. Use appropriate cleaning products to address these issues before applying wax, as buffing over contaminants can spread them across your paint surface.
Step 3: Apply Wax to the Buffer Pad
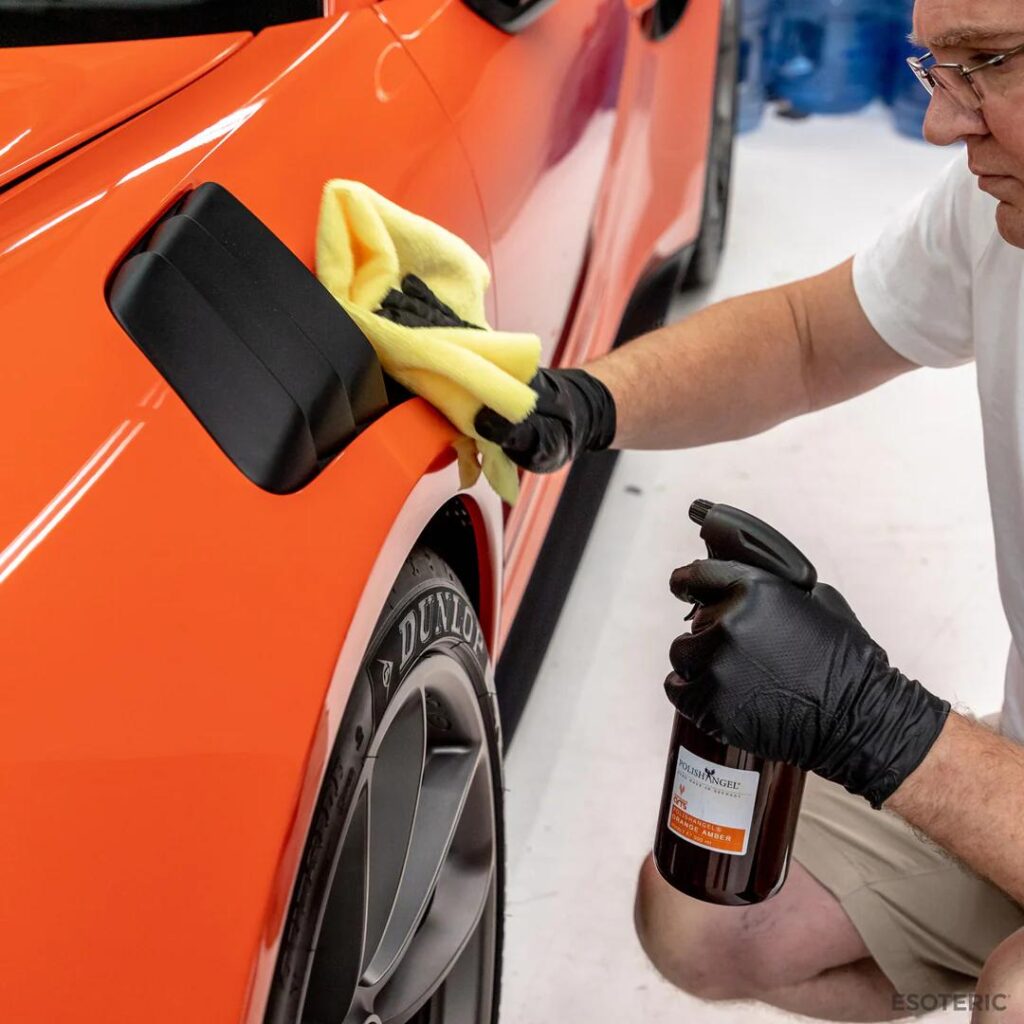
Attach a clean foam applicator pad to your buffer, ensuring it’s securely fastened. Apply several small dots of wax directly to the pad—about the size of a quarter should cover a 2×2 foot section. Avoid applying too much wax, as excess product will only create more work during the removal process.
Distribute the wax evenly across the pad by lightly touching it to your car’s surface before turning on the buffer. This prevents wax from flying off the pad when you first start the machine. Some detailers prefer to spread the wax by hand first, but using the buffer on its lowest setting achieves the same result more efficiently.
Prime your pad by working a small amount of wax into it before beginning your first section. This helps the pad hold and distribute the wax more evenly throughout the application process.
Step 4: Start Buffing in Sections
Divide your car into manageable sections, typically 2×2 feet each. Start with the hood, as it’s a large, flat surface that’s easy to work on while you develop your technique. Set your buffer to its lowest speed setting and place the pad flat against the surface before turning on the machine.
Use slow, overlapping passes in straight lines rather than circular motions. Move the buffer at approximately the speed you would when hand-washing your car—about one inch per second. Maintain light, consistent pressure, allowing the weight of the buffer to do most of the work.
Work the wax into the paint using a crosshatch pattern: make several passes in one direction, then work perpendicular to those passes. This ensures complete coverage and helps fill any minor imperfections in the paint surface. Keep the buffer moving at all times to prevent heat buildup that could damage your paint.
Complete one section before moving to the next, and avoid letting wax dry for extended periods. Most waxes should be removed within 5-10 minutes of application, depending on temperature and humidity conditions.
Step 5: Buff and Remove Residue
Switch to a clean microfiber pad for the removal process. Microfiber is superior to foam for wax removal because its structure effectively lifts residue without leaving behind lint or streaks. Set your buffer to a slightly higher speed setting for removal—typically one or two steps above your application setting.
Use the same straight-line, overlapping pattern you used during application. The buffer should glide smoothly across the surface with minimal resistance. If you encounter areas where the pad seems to drag or grab, the wax may not have cured properly, or you may need to reduce your speed setting.
After buffing each section, inspect your work under good lighting conditions. Look for any remaining wax residue, which appears as cloudy or streaky areas. Address these spots immediately with a clean microfiber towel or another pass with the buffer.
Pay special attention to edges, trim pieces, and recessed areas where wax tends to accumulate. Use a clean microfiber towel to carefully remove residue from these areas by hand, as the buffer may be too large to access these tight spaces effectively.
Step 6: Final Touches
Once you’ve completed the entire vehicle, perform a final inspection in different lighting conditions. Walk around your car and look for any missed spots, streaks, or areas where the wax coverage appears uneven. Address any imperfections immediately while your equipment is still accessible.
Clean your buffer pads thoroughly after each use to maintain their effectiveness. Foam pads can be washed with warm, soapy water and allowed to air dry. Microfiber pads should be laundered separately from other items to prevent contamination.
Store your buffer in a clean, dry location with the cord loosely coiled to prevent damage. Remove the pads and store them separately to maintain their shape and prevent contamination.
Take a moment to appreciate your work. The deep, glossy finish you’ve achieved not only looks fantastic but also provides months of protection for your vehicle’s paint.
Best Buffing Pads and Products to Use
Foam pads are the most popular choice for wax application because they hold product well and provide even distribution across the paint surface. Different foam densities serve specific purposes: soft foam pads work best for final polishing and wax application, while firmer pads are better suited for cutting compounds and paint correction work.
Microfiber pads excel at wax removal and final polishing steps. Their unique fiber structure effectively lifts residue while imparting an additional layer of shine to your paint. High-quality microfiber pads can be washed and reused dozens of times with proper care.
When selecting car wax for buffer application, consider products specifically formulated for machine application. These waxes typically have a consistency that works well with buffers—not too thick that they’re difficult to spread, but not so thin that they splatter during application.
Synthetic waxes generally work better with buffers than traditional carnauba waxes because they’re engineered for consistent application and removal. Popular synthetic options include polymer sealants and ceramic-infused waxes that provide longer-lasting protection.
Avoid combination products that claim to clean and wax simultaneously when using a buffer. These products often contain mild abrasives that can create swirl marks when used with machine application. It’s better to use dedicated products for each step of the process.
How to Maintain Your Buffer and Pads for Long-Lasting Use
Proper maintenance of your buffer and pads ensures consistent performance and extends their useful life significantly. After each use, remove all wax residue from your equipment before it has a chance to harden and become difficult to remove.
Clean foam pads immediately after use by rinsing them under warm running water while gently working the residue out with your fingers. Avoid using harsh detergents or solvents that could break down the foam structure. Allow pads to air dry completely before storing them in a clean, dust-free environment.
Microfiber pads require special attention during washing. Use a mild detergent without fabric softener, as these additives can coat the fibers and reduce their effectiveness. Wash microfiber pads separately from other laundry items to prevent lint contamination.
Inspect your buffer’s power cord regularly for signs of wear or damage. A damaged cord poses a safety hazard and should be replaced immediately. Keep the motor vents clean and free of debris to ensure proper cooling during operation.
Store your buffer with the cord loosely coiled rather than tightly wound around the unit. Tight coiling can damage the internal wiring over time and lead to premature failure. Consider hanging the buffer on a wall mount to prevent damage from being dropped or knocked over in storage.
Replace worn pads promptly to maintain optimal performance. Compressed foam pads that no longer return to their original shape, or microfiber pads with matted fibers, will not distribute or remove wax effectively and should be discarded.
Frequently Asked Questions
Can I wax a car without a buffer?
Yes, you can absolutely wax a car by hand using traditional applicator pads and microfiber towels. Hand waxing gives you complete control over pressure and coverage, making it ideal for delicate areas or vintage vehicles with sensitive paint. However, hand application requires significantly more time and physical effort, and achieving perfectly even coverage across large surfaces can be challenging.
The main advantage of hand waxing is the reduced risk of paint damage, as you can feel any imperfections or contaminants on the surface before they cause scratches. Many professional detailers still prefer hand application for show cars or vehicles with rare paint finishes.
How often should I wax my car?
Most vehicles benefit from waxing every 3-4 months, but this frequency depends on several factors including your local climate, driving conditions, and storage situation. Cars exposed to harsh sunlight, salt air, or frequent rain may need waxing every 2-3 months, while garage-kept vehicles in mild climates might only need waxing twice per year.
A simple water test can help determine when your car needs rewaxing: if water no longer beads on the surface and instead spreads into sheets, your wax protection has diminished and it’s time for a fresh application.
Can I use any buffer for waxing my car?
Not all buffers are suitable for car waxing. Dual-action (random orbital) buffers are the safest choice for most car owners because they’re designed to minimize the risk of paint damage. Rotary buffers, while more powerful, require greater skill and experience to use safely and are typically reserved for professional applications.
Avoid using household cleaning buffers or sanders for car waxing, as these tools aren’t designed for automotive finishes and can cause irreversible damage. Invest in a quality automotive buffer with variable speed control for the best results.
Should I wax my car in the sun or shade?
Always wax your car in the shade or during cooler parts of the day. Direct sunlight heats the paint surface, causing wax to dry too quickly and become difficult to remove. This can result in streaking, residue buildup, and an uneven finish that requires additional work to correct.
For comprehensive strategies on safeguarding your car’s paint from sun damage, consider exploring our detailed guide on Always wax your car in the shade or during cooler parts of the day. Direct sunlight heats the paint surface, causing wax to dry too quickly and become difficult to remove. This can result in streaking, residue buildup, and an uneven finish that requires additional work to correct.
For comprehensive strategies on safeguarding your car’s paint from sun damage, consider exploring our detailed guide on How to Protect Car Paint. It offers valuable insights into maintaining your vehicle’s exterior and preserving its appearance.How to Protect Car Paint. It offers valuable insights into maintaining your vehicle’s exterior and preserving its appearance.
Ideal waxing conditions include temperatures between 60-80°F with low humidity and no direct sunlight. Early morning or late afternoon often provide the best working conditions for outdoor waxing.
What’s the best type of wax to use with a buffer?
Synthetic waxes and paint sealants generally work best with buffers because they’re formulated for consistent machine application. These products typically have the ideal viscosity for even distribution and removal without excessive buildup or streaking.
Look for products specifically labeled as “machine-friendly” or “buffer-safe.” Avoid paste waxes that are too thick, as they can load up your pads and make removal difficult. Liquid waxes and spray sealants often provide the best results when applied with a buffer.
Transform Your Car’s Appearance with Professional Results
Learning to wax your car with a buffer opens up a world of possibilities for maintaining your vehicle’s appearance at a professional level. The initial investment in quality equipment pays dividends through years of superior protection and stunning visual results that simply can’t be achieved through hand application alone.
Achieving a Deep, Mirror-Like Finish
The satisfaction of achieving a deep, mirror-like finish on your own vehicle is unmatched. Not only does it enhance the aesthetic appeal, but the protective benefits will keep your car looking newer for years to come. With proper technique and regular maintenance, your buffer will become an invaluable tool in preserving your vehicle’s appearance and value.
For more information on safeguarding your car’s paint, consider exploring our detailed guide on How to Protect Car Paint.
As an Amazon Associate, I earn from qualifying purchases